Home Aweigh II
New member
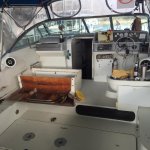
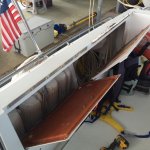
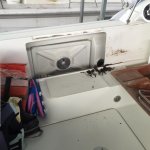
Finally finished the re-laminate project and the Admiral is happy. The head door matches the rest of the galley project.
HA II

HA II


")
thanks, it looks like we are now on the hunt for a material to use for the settee cushions. Admiral says blue needs to go now, not next year and i agree. ordered samples from ultraleather so hopefully we can find something suitable.