Virtual Factory Tour


castines

Administrator
Hi, below you will see a very very short version of what you will see if you visit Formula and take the factory tour. I apologize for not having detailed descriptions of what model boats are in the pics, but its very hard for me to remember whats what now that i am looking at the pictures.

If you wish to reply to this post, please do not use the quote option. Enjoy ;D

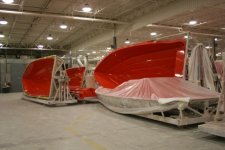
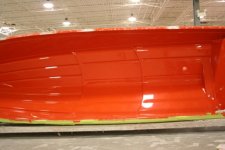
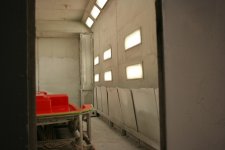
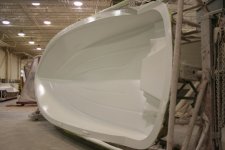
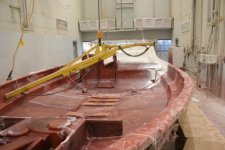
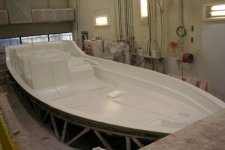
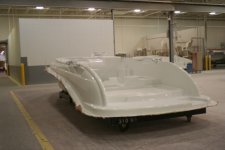
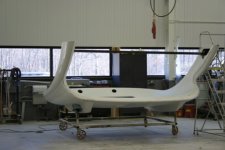
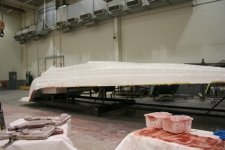
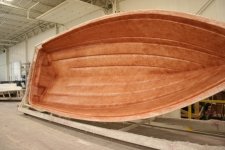
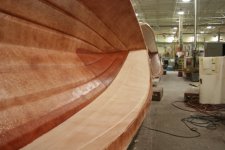
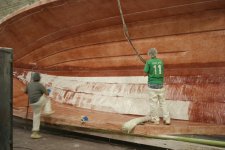
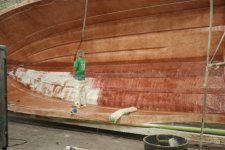
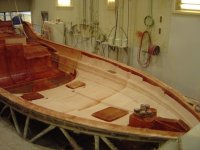
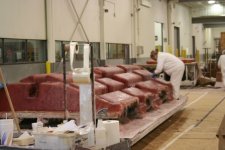
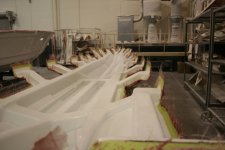
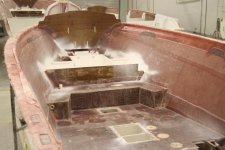
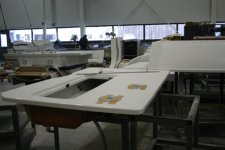
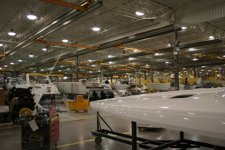
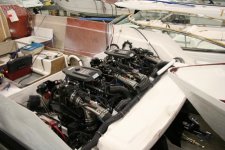
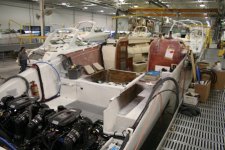
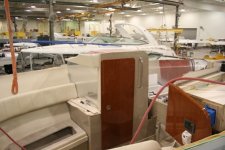
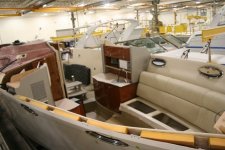
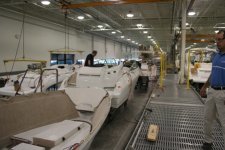
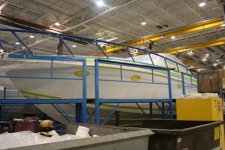
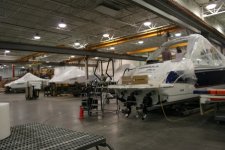
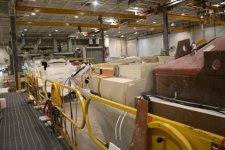
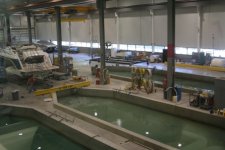
Here you see the hull molds for a few models and then gelcoat being applied.
 

Attachments

  • Formula 1.JPG
    Formula 1.JPG
    59.1 KB · Views: 177
  • Formula 2.JPG
    Formula 2.JPG
    65 KB · Views: 124
  • Hull Molds.JPG
    Hull Molds.JPG
    76.6 KB · Views: 137
  • Fastech Hull.JPG
    Fastech Hull.JPG
    65.5 KB · Views: 119
  • Gel spray booth.JPG
    Gel spray booth.JPG
    50.7 KB · Views: 119
  • Gel sprayed and curing.JPG
    Gel sprayed and curing.JPG
    63.9 KB · Views: 122
Top deck in mold and them removed. Hard top in mold and removed and assembly of hard top. What you dont see is how the molds or plugs were made. Thats in the RnD area (off limits to photos) and all is done by hand. Shaping, sanding polishing to get the molds just right for that mirror finish. Very time consuming.
 

Attachments

  • Large Top deck PC-Yacht cant remember.JPG
    Large Top deck PC-Yacht cant remember.JPG
    81.8 KB · Views: 91
  • Top Deck PC Gel Curing.JPG
    Top Deck PC Gel Curing.JPG
    61.7 KB · Views: 86
  • Top Deck out of mold.JPG
    Top Deck out of mold.JPG
    56.5 KB · Views: 80
  • Hard top curing.JPG
    Hard top curing.JPG
    79.9 KB · Views: 69
  • Hard top assembly.JPG
    Hard top assembly.JPG
    64.7 KB · Views: 74
  • Large PC top deck out of mold.JPG
    Large PC top deck out of mold.JPG
    70.2 KB · Views: 78
Here you see core mat and fiberglass mat installed into the hull and top deck. The core mat stops the glass fiber from showing thru the gelcoat. Also a sub component assy area.
 

Attachments

  • Hull glassed.JPG
    Hull glassed.JPG
    78.9 KB · Views: 78
  • Hull Core Mat install.JPG
    Hull Core Mat install.JPG
    75.2 KB · Views: 71
  • Hull Glass Matt install.JPG
    Hull Glass Matt install.JPG
    2.7 MB · Views: 74
  • Hull Glass Matt install 2.JPG
    Hull Glass Matt install 2.JPG
    82.3 KB · Views: 71
  • Top Deck Matt install.jpg
    Top Deck Matt install.jpg
    41.5 KB · Views: 71
  • Component - subassembly area 2.JPG
    Component - subassembly area 2.JPG
    71.9 KB · Views: 85
Various hull getting fitted with stringer/support systems for bedding, sofas etc...

Picture of sub assy getting chop glass applied and then rolled to make smooth. First pic is the fiberglass stringer component for Fastech and SS.

4th pic is support system/stringers. This design actually kinda floats and is not completely glassed to the hull.
 

Attachments

  • Fastech Fiber Stringer assy.JPG
    Fastech Fiber Stringer assy.JPG
    74.8 KB · Views: 89
  • Fastech Stringer assy 2.JPG
    Fastech Stringer assy 2.JPG
    65.6 KB · Views: 76
  • Floor-bed support.JPG
    Floor-bed support.JPG
    2.7 MB · Views: 76
  • Support-stringer system PC-SS.JPG
    Support-stringer system PC-SS.JPG
    79.5 KB · Views: 90
  • PC Floor.jpg
    PC Floor.jpg
    41.5 KB · Views: 85
  • Chop glass application to sub assy.JPG
    Chop glass application to sub assy.JPG
    2.2 MB · Views: 75
During set up of hull and top deck, other parts of the boats are built in components in different areas of the factory. once the boat gets to the line, all these parts are ready to be installed on the line.
 

Attachments

  • Component assy area.JPG
    Component assy area.JPG
    63.1 KB · Views: 66
  • Component - subassembly area 2.JPG
    Component - subassembly area 2.JPG
    71.9 KB · Views: 61
  • Gel and Resin tanks.JPG
    Gel and Resin tanks.JPG
    89.4 KB · Views: 65
  • CnC machine.JPG
    CnC machine.JPG
    88.9 KB · Views: 59
  • wood shop.JPG
    wood shop.JPG
    92 KB · Views: 67
  • Upholstry Shop.JPG
    Upholstry Shop.JPG
    79.7 KB · Views: 74
Now the lines start. Each line has 2 sides. i think there was 6 lines in the small boat area. and 3 in the large boat area in different part of building. Notice that the bottom and top go down the line next to each other. after all components are installed on both top and bottom, at the end of the line they get put together. Each line does more than 1 type boat.
 

Attachments

  • Now the production lines start.JPG
    Now the production lines start.JPG
    89.4 KB · Views: 96
  • Small boat line top n bottom go down line.JPG
    Small boat line top n bottom go down line.JPG
    90 KB · Views: 101
  • Engine and misc component install.JPG
    Engine and misc component install.JPG
    91.9 KB · Views: 102
  • 330 SS.JPG
    330 SS.JPG
    103.1 KB · Views: 101
  • Cabinet component install.JPG
    Cabinet component install.JPG
    83.6 KB · Views: 94
  • SS.JPG
    SS.JPG
    85.5 KB · Views: 114
Here you see a shot down the line, then ready for test tank, in the tank, then masked and into the paint booth. once out of the booth its buffing time
 

Attachments

  • IMG_3532.JPG
    IMG_3532.JPG
    87.3 KB · Views: 88
  • Next step tank test.JPG
    Next step tank test.JPG
    34.4 KB · Views: 91
  • Tank test.JPG
    Tank test.JPG
    86.1 KB · Views: 111
  • Out of test tank into paint booth.JPG
    Out of test tank into paint booth.JPG
    87.4 KB · Views: 103
  • Masked for paint.JPG
    Masked for paint.JPG
    90.8 KB · Views: 92
  • out of paint booth for buffing.JPG
    out of paint booth for buffing.JPG
    77.2 KB · Views: 102
End of the line. QC time and wrapped for shipment.

The end.

This is just a snapshot of a 2 hour tour. These pictures do not justify what you see in real life.
 

Attachments

  • 45 Yacht finished paint booth.JPG
    45 Yacht finished paint booth.JPG
    67.3 KB · Views: 93
  • Buffed and QC time.JPG
    Buffed and QC time.JPG
    79.6 KB · Views: 95
  • Ready for wrap.JPG
    Ready for wrap.JPG
    88 KB · Views: 82
  • Ready to ship.JPG
    Ready to ship.JPG
    54.2 KB · Views: 86
  • Formula 1.JPG
    Formula 1.JPG
    59.1 KB · Views: 70
IPS pics

All pics in 40PC
 

Attachments

  • IPS 40PC.JPG
    IPS 40PC.JPG
    116.1 KB · Views: 85
  • 40PC IPS 2.JPG
    40PC IPS 2.JPG
    2.9 MB · Views: 89
  • 40PC IPS 3.JPG
    40PC IPS 3.JPG
    171.9 KB · Views: 101
  • 40PC IPS 4.JPG
    40PC IPS 4.JPG
    142.7 KB · Views: 81
  • 40PC IPS 5.JPG
    40PC IPS 5.JPG
    3.3 MB · Views: 83
MISC Factory Pics

Enjoy
 

Attachments

  • 40PC Line.JPG
    40PC Line.JPG
    93.7 KB · Views: 66
  • Large boat test tanks.JPG
    Large boat test tanks.JPG
    75 KB · Views: 79
  • MOPOWER.JPG
    MOPOWER.JPG
    71.2 KB · Views: 88
  • port cabinet rear view assy.JPG
    port cabinet rear view assy.JPG
    87.2 KB · Views: 68
  • 2nd floor shot.JPG
    2nd floor shot.JPG
    153.6 KB · Views: 68
  • Twins.JPG
    Twins.JPG
    89.5 KB · Views: 98
STEVE,
I AM VERY IMPRESSED AT THE GREAT JOB YOU HAVE DONE PUTTING ALL THESE PICTURES IN PERSPECTIVE. IT MUST HAVE TAKEN ALOT OF TIME TO ACCOMPLISH THIS. THANKS AGAIN FOR THE GREAT WORK.
 
Cool! I think its cool when Nick sends me pictures of something I have a question about and see all the stuff going on in the background.
 
Hi guys,

Virtual factory tours are a way for people to experience a factory without physically being there. They typically take place online, often through a website or a video conferencing platform. During a virtual factory tour, you may see videos or pictures of the factory's interior, hear explanations of how the machinery works, and learn about the products being produced.
The virtual tour may be guided, meaning that a person will be leading you through the tour and answering any questions you might have. Alternatively, you might be able to explore the factory on your own and interact with different elements of the tour at your own pace
 
I did an in person tour when I was about 15. Top quality stuff all around.

Although... putting the engines in before you put the deck on... that's cheating :p
 
Back
Top