45 Skylights


FormulatCT

Member
b2a897f9729622cfa21cd24ebbbc91e8.jpg


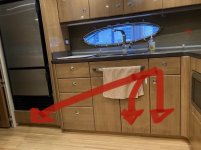
After several attempts to seal the skylights and stop the leaking, I decided it was time to consider a permanent fix. So, I?m having them fiberglassed over.

I will post finished pics later, but here is an in progress shot.


Sent from my iPhone using Tapatalk
 
Last edited:
Wow! I understand your frustration, but wow!

In the little over a year we’ve had the boat, we’ve redone the caulking at least twice on each skylight. The most recent time we dug it all out, backfilled it most of the way with 5200, let it set for several days, then put a finishing layer of 5200 on top. So far so good and fingers crossed.
 
Looks good. How?s the lighting in the salon now?

I am very surprised to now realize how much light comes in from the sliding cabin door. Of course, plenty of natural light comes in, through the 2 large windows.

The very one positive benefit I can already see, is a reduction of heat coming in through the skylights. My expectation is less stress on the a/c, as it seems to struggle keeping up on the hotter days.

I purchased 6 remote control, rechargeable LED light strips. I need to install them. I?ll provide more details, and take some pics, once they?re up. They are dimmable, and have a bright and warm light setting, so I?m thinking they will be functional and provide a nice effect.

Sent from my iPhone using Tapatalk
 
Last edited:
I reacted "wow!" as well. I'm sure the leaking was a mess, but wow.

The sealant around our skylights was starting to crack and to crumble, so clearly it was time. I was ready for the worst and was dragging my feet.

My wife, who in 20 plus years has never taken "no" for an answer, ordered a couple of tubes of a 3M silicone product, drove her self down to the boat one afternoon. She was back before dinner, and said "all done!" I couldn't believe it, but sure enough, she'd dug out all the old stuff (the skylights were still firm), filled it in with the silicone, and a couple of days later, we hosed it down, and presto: all good for at least a few more years.

How can mileage vary so drastically I wonder?

I should add that your fiberglass guy did what looks like a really nice job. but wow!

-peter
 
So where do you see the water? Under the salon seating, headliner?

Having them resealed right now, just want to be certain on where to look.

Thanks,
Dave
 
So where do you see the water? Under the salon seating, headliner?

Having them resealed right now, just want to be certain on where to look.

Thanks,
Dave

My leaks were visible as dirty streaks down the trim below the skylights... and small puddles on the sole.

If you have water under the salon seating, I'd say your AC drain pan is overflowing. I have a couple of plastic tubes I use annually to blow out my AC drains, from the sump in the aft cabin forward.

If the skylights leak enough water, trust me it?s absolutely possible to collect a good amount of water under the salon seating, specifically the cushion directly below the big tv.


Sent from my iPhone using Tapatalk
 
If the skylights leak enough water, trust me it?s absolutely possible to collect a good amount of water under the salon seating, specifically the cushion directly below the big tv.


Sent from my iPhone using Tapatalk

Yes, that is where we noticed it. The AC pan was draining properly!

Thanks,
Dave
 
i hope you guys have seen my other post about using Silpruf. i had one guy tell me that 5200 wouldn't bond to the acrylic. works from the factory because it beds in it...but when you're digging out the sides, it will always fail. the Silpruf lasted years for me...and i had done them at least half a dozen times with 5200 or other silicon based solutions before i found that solution...

food for thought..
twarble
 
I did see your other thread and that?s the advice I followed. The one difference we did was to do it in a multi layered approach. We cleaned the channels out, filled it about 3/4 of the way with silpruf, let it cure for a couple of days while covered in a trash bag, then topped it off with another layer.

So far so good.
 
Last edited:
What tools did you guys use to dig the old silicone out?
From my experience with various sailing vessels over the years, Dow Corning 795 Silicone Building Sealant has worked phenomenally for us.
This is my next project. We purchased our Formula 45 almost a month ago and didn't notice the leaks until our first overnight anchoring last weekend.
Now we know why the galley doors were damaged. :(
Galley doors.jpg
 
Yea, A combo of everything to dig it out. I agree.

I hope I fixed it too.

Dug out all of the old stuff. Then roughed up the whole mating surface and re-bedded the skylight without the weather stripping using SilPruf. One layer one day and waited until the second day for the finial finish coat. Looks real nice and does not leak...So far.

I did the Port side because of the leak, I will do the same to the Stbd next year...

Dave

Did you remove the skylight to re-bed it?


Sent from my iPad using Tapatalk
 
Did you remove the skylight to re-bed it?


Sent from my iPad using Tapatalk

Yes I did. But, I used the SilPruf to re-bed it. Think it will be okay?

Dave
 

Attachments

  • 8D259FE9-D02B-40C4-8607-D5AB8C4946E3.jpg
    8D259FE9-D02B-40C4-8607-D5AB8C4946E3.jpg
    16.5 KB · Views: 41
  • 24338B74-CD11-45B5-99BF-43DDA4045C84.jpg
    24338B74-CD11-45B5-99BF-43DDA4045C84.jpg
    18.6 KB · Views: 38
  • 28A42593-015F-411F-A0F1-2A96E182DFF2.jpg
    28A42593-015F-411F-A0F1-2A96E182DFF2.jpg
    8.4 KB · Views: 41
Last edited:
I got around to it last weekend. Couldn't have picked a better day. It was overcast and cool most of the morning and I only suffered through a few hours of sun.
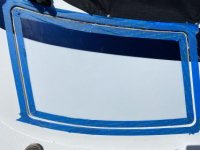
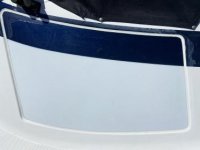
Did both. First I removed the majority of the caulk and then got the rest off with acetone. Clean down to the visible channel but did not remove and re-embed. Will do that the next time if this doesn't last very long. Taped both sides and filled adequately with my favorite silicone for this purpose, Dow Corning 795. Smoothed and perfected it with water mixed with dish washing liquid, removed the tape and touched up a little. Hosed it down the next day to test, and hopefully it will stay dry for at least a few years. Next step is to redo the blue stripe.
View attachment 11454Taped.jpgFinished.jpg
 

Attachments

  • Siliconed.jpg
    Siliconed.jpg
    11.4 KB · Views: 32
Back
Top